laatste nieuws
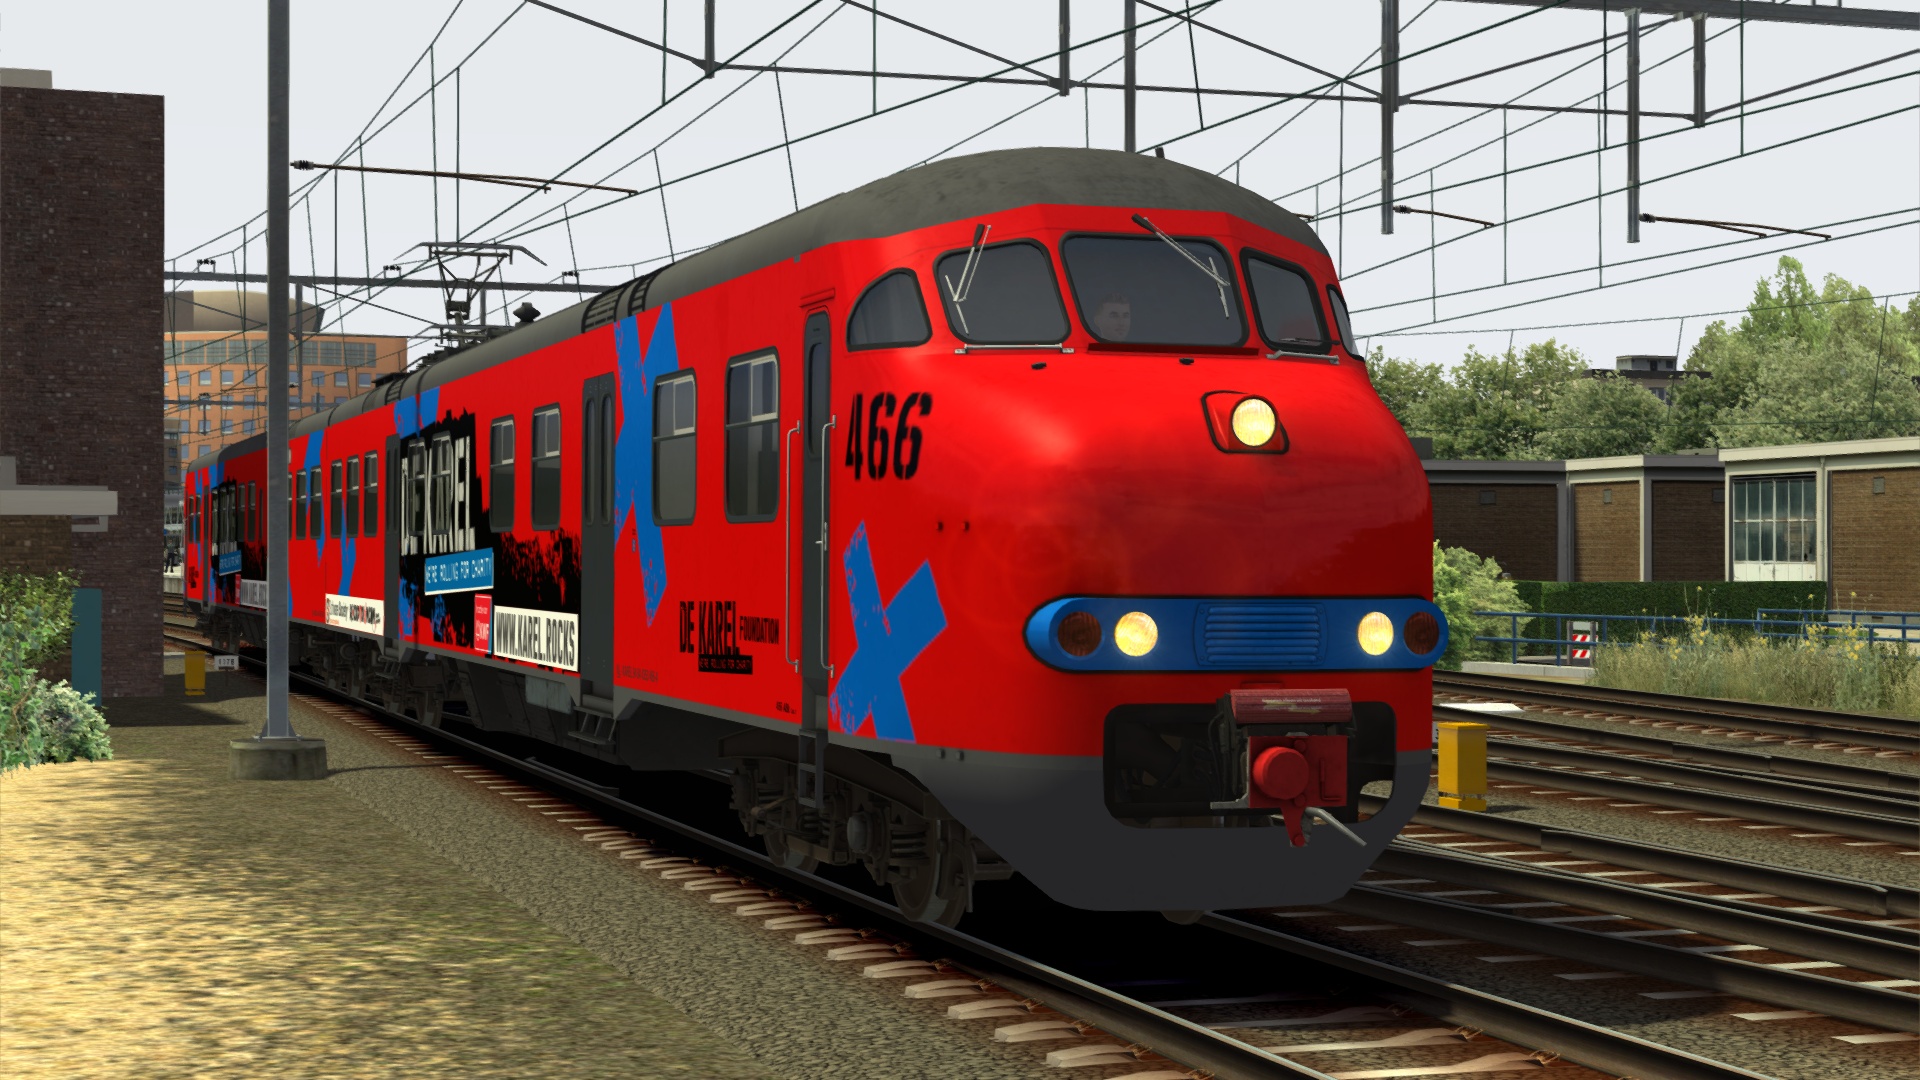
Update v4.0.0 voor Mat'64 is nu beschikbaar, inclusief een nieuwe kleurstelling om geld in te zamelen voor het goede doel: de 466 'Karel'.
![[menu logo]](../images/christrainslogodot.png)
Update v4.0.0 voor Mat'64 is nu beschikbaar, inclusief een nieuwe kleurstelling om geld in te zamelen voor het goede doel: de 466 'Karel'.
Wilt u meer dan één product kopen om uw collectie te beginnen of uit te breiden? Gebruik deze coupons voor de volgende kortingen:
GIMME2 = 10% korting op 2 producten
GIMME3 = 15% korting op 3 producten
GIMME4 = 20% korting op 4 of meer producten
U kunt zich abonneren op de nieuwsbrief op het mailing lijst voor af en toe updates en belangrijke aankondigingen.


Note:This guide is only intended for developers making their own trains and rolling stock. From TS2014 onwards, players can assemble their own QuickDrive consists using the game's built-in QuickDrive consist editor.
QuickDrive consists allow players to quicky pick a train, a route, and some time of day information and hop into the train and go. It means casual users don't need to know how to make their own scenarios just to drive trains in their collection. Making your add-ons available to QuickDrive is quite straightforward. For best results there are two steps to complete - the first is the consist itself, the second is the Loco Information screen.
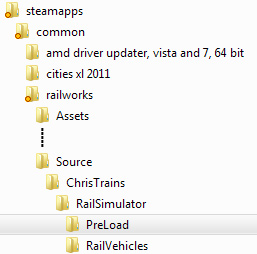
To add consists for your product, you need to create a PreLoad folder in your source developer folder structure. I'm using my own products as an example here, so you can see my PreLoad folder sits here: C:\Program Files (x86)\Steam\steamapps\
common\railworks\Source\ChrisTrains\
RailSimulator\PreLoad.
Navigate to this folder in the blueprint editor, right-click the folder and choose New Blueprint. From the list, select Consist Blueprint. The Consist Entry section is where you put together the consist by referencing the XML files for each wagon. You can do this for both your own wagons and engines as well as the ones that come supplied with the game, even though you don't have the sources to those items. Take a look at the screen below and you'll see the first two entries from one of my consists. This is my 2200 class engine with one of the Railworks-provided wagons behind it.
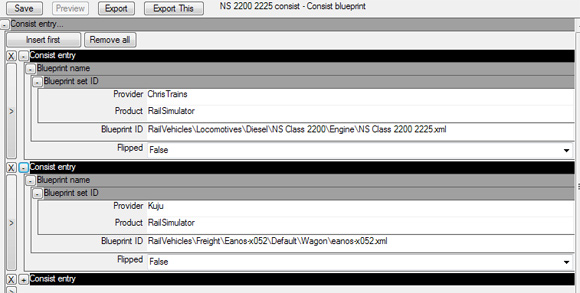
For the engine, you can see I've directly referenced my own XML file for the engine definition. For the Railworks wagon, I've referenced an XML file that doesn't exist but that's OK - when you build this consist, as long as you choose Export This in the blueprint editor, it will only export the .bin file for the consist, and not try to convert any of the child entities that you've referenced. That entry to the Railworks XML file for the Eanos (in this case) will become an entry for a .bin file, and that file does exist.
There's obviously an important caveat here : if you attempt to reference a model that doesn't exist, your consist will fail.
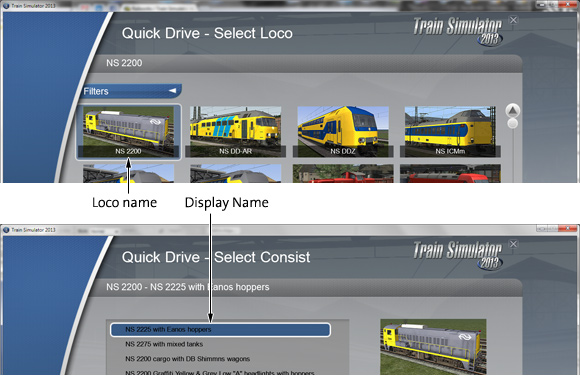
A little lower down the consist blueprint you'll find the human-readable names that will appear in the game's QuickDrive menu system:
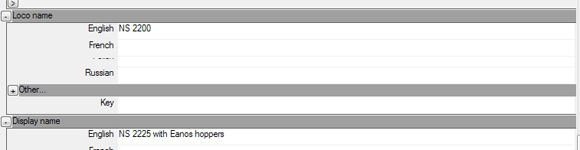
The Loco Name is the name that shows up when you go into the main train selection screen in QuickDrive. If you have several consists available for the same engine, then this name should be the same in each consist file. The Display Name is the actual consist name that shows up in the second menu screen after you've picked the engine.
Finally, at the bottom of the consist blueprint, you'll find some important information about how this consist can be used by the player and the game's AI.
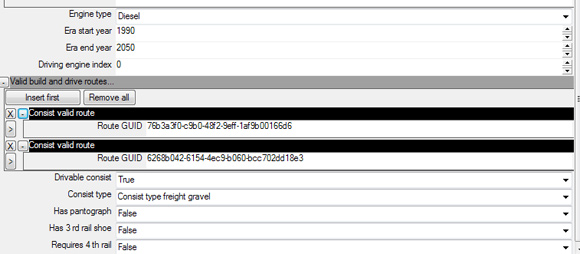
Obviously you need to make sure the Engine type is set correctly. The era dates determine which era the engine will show up if the player chooses to filter their engines by era instead of by type. Drivable consist needs to be set to True if this is a consist you want players to control, or False if it's one you want the game to control and place using the quickdrive AI. The Consist Type determines the priority of the consist at signals. The higher up the list, the higher the priority, so if you're in a gravel freight train and an Intercity Passenger train is coming up the line, you'll have to wait. Possibly the most important part of the whole blueprint are the power choices. Depending on how you set the options for Pantograph, 3rd rail and 4th rail, will determine where this consist can be used. It's important to note that routes that only have part electrification do not allow the consist to work on them. For example if a consist is set to Has Pantograph = True, it will not be playable on the Great Western Main Line because only part of that line has overhead cables.
The Consist valid route section determines where the game's AI can place this consist. The Route GUID is the long string of numbers and letters for the route's folder name in the assets tree. For example C:\Program Files (x86)\Steam\steamapps\common\railworks\Content\Routes\6268b042-6154-4ec9-b060-bcc702dd18e3. This is really important: An electic train should not list non-electrified routes in this section. If it does, the game will fail when drivers attempt to QuickDrive that route as the AI will not be able to move an electric train on a non-electrified route.
Remember when you export the blueprint, choose Export This and NOT just 'Export'. This ensures that only the consist blueprint gets exported and that it doesn't attempt to convert the child wagons.
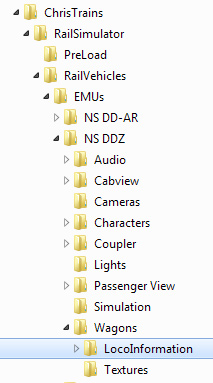
The above section is all that needs to happen for a consist to appear in QuickDrive, but for user-friendliness, the LocoInformation folder should be populated too. This folder needs to be created your developer Assets folder directly - as it isn't a blueprint, it will not be placed there by the blueprint editor. The LocoInformation folder should reside in the same folder as the XML/BIN definition for the engine that it represents, or it won't show up in the game. In this example the BIN file for my 2200 class diesel locomotive is here so this is the folder that should contain the LocoInformation folder: C:\Program Files (x86)\Steam\steamapps\common\
railworks\Assets\ChrisTrains\RailSimulator\RailVehicles\
Locomotives\Diesel\NS Class 2200\Engine.
This folder should have a small image in it (256x128 pixels) in PNG format, RGB mode.
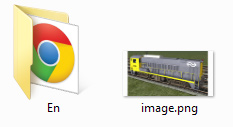
This is the picture that shows up in the game menus. A number of subfolders should be here too, one for each language that you want a description to appear in. In this example you can see the small thumbnail of the 2200 engine and an En folder for English. In the language folder, you need a single file called Description.html which is a short HTML file that shows up when players select Info for an engine they're looking at in the game's menu system. You can find examples of the format of this file and the size of the PNG picture in any of the installed examples that come with the game.
![[email]](../images/email-blue.png)


 is eigendom en handelsmerk van de Nederlandse Spoorwegen.